0.1. TFlow Quick Start Tutorial for Beginners
Welcome to TFlow! TFlow is an all-in-one trade workflow platform that brings together email communication, file storage, trade regulation review, and blockchain-based payments (escrow) in one place.
Login and Sign Up
If you see "Email already in use." — an account already exists for that address. Go back to Login and sign in, or use Forgot your password? to reset it if you can't remember. Accounts created with Google or Kakao count as duplicates too if the email matches.
You can log in to TFlow in several ways.
- Email sign-up: Create an account directly with your email and password.
- Google account: Sign up and log in easily with the Google login button.
- Kakao account: Sign up and log in easily with the Kakao login button.
💡 Public pages without login ✨ NEW: Even without logging in, you can browse the TFlow introduction, About, Support, and Terms & Privacy at
tflowx.com/. Static SEO content has been enhanced so that search engines (Google, etc.) can find the service directly.
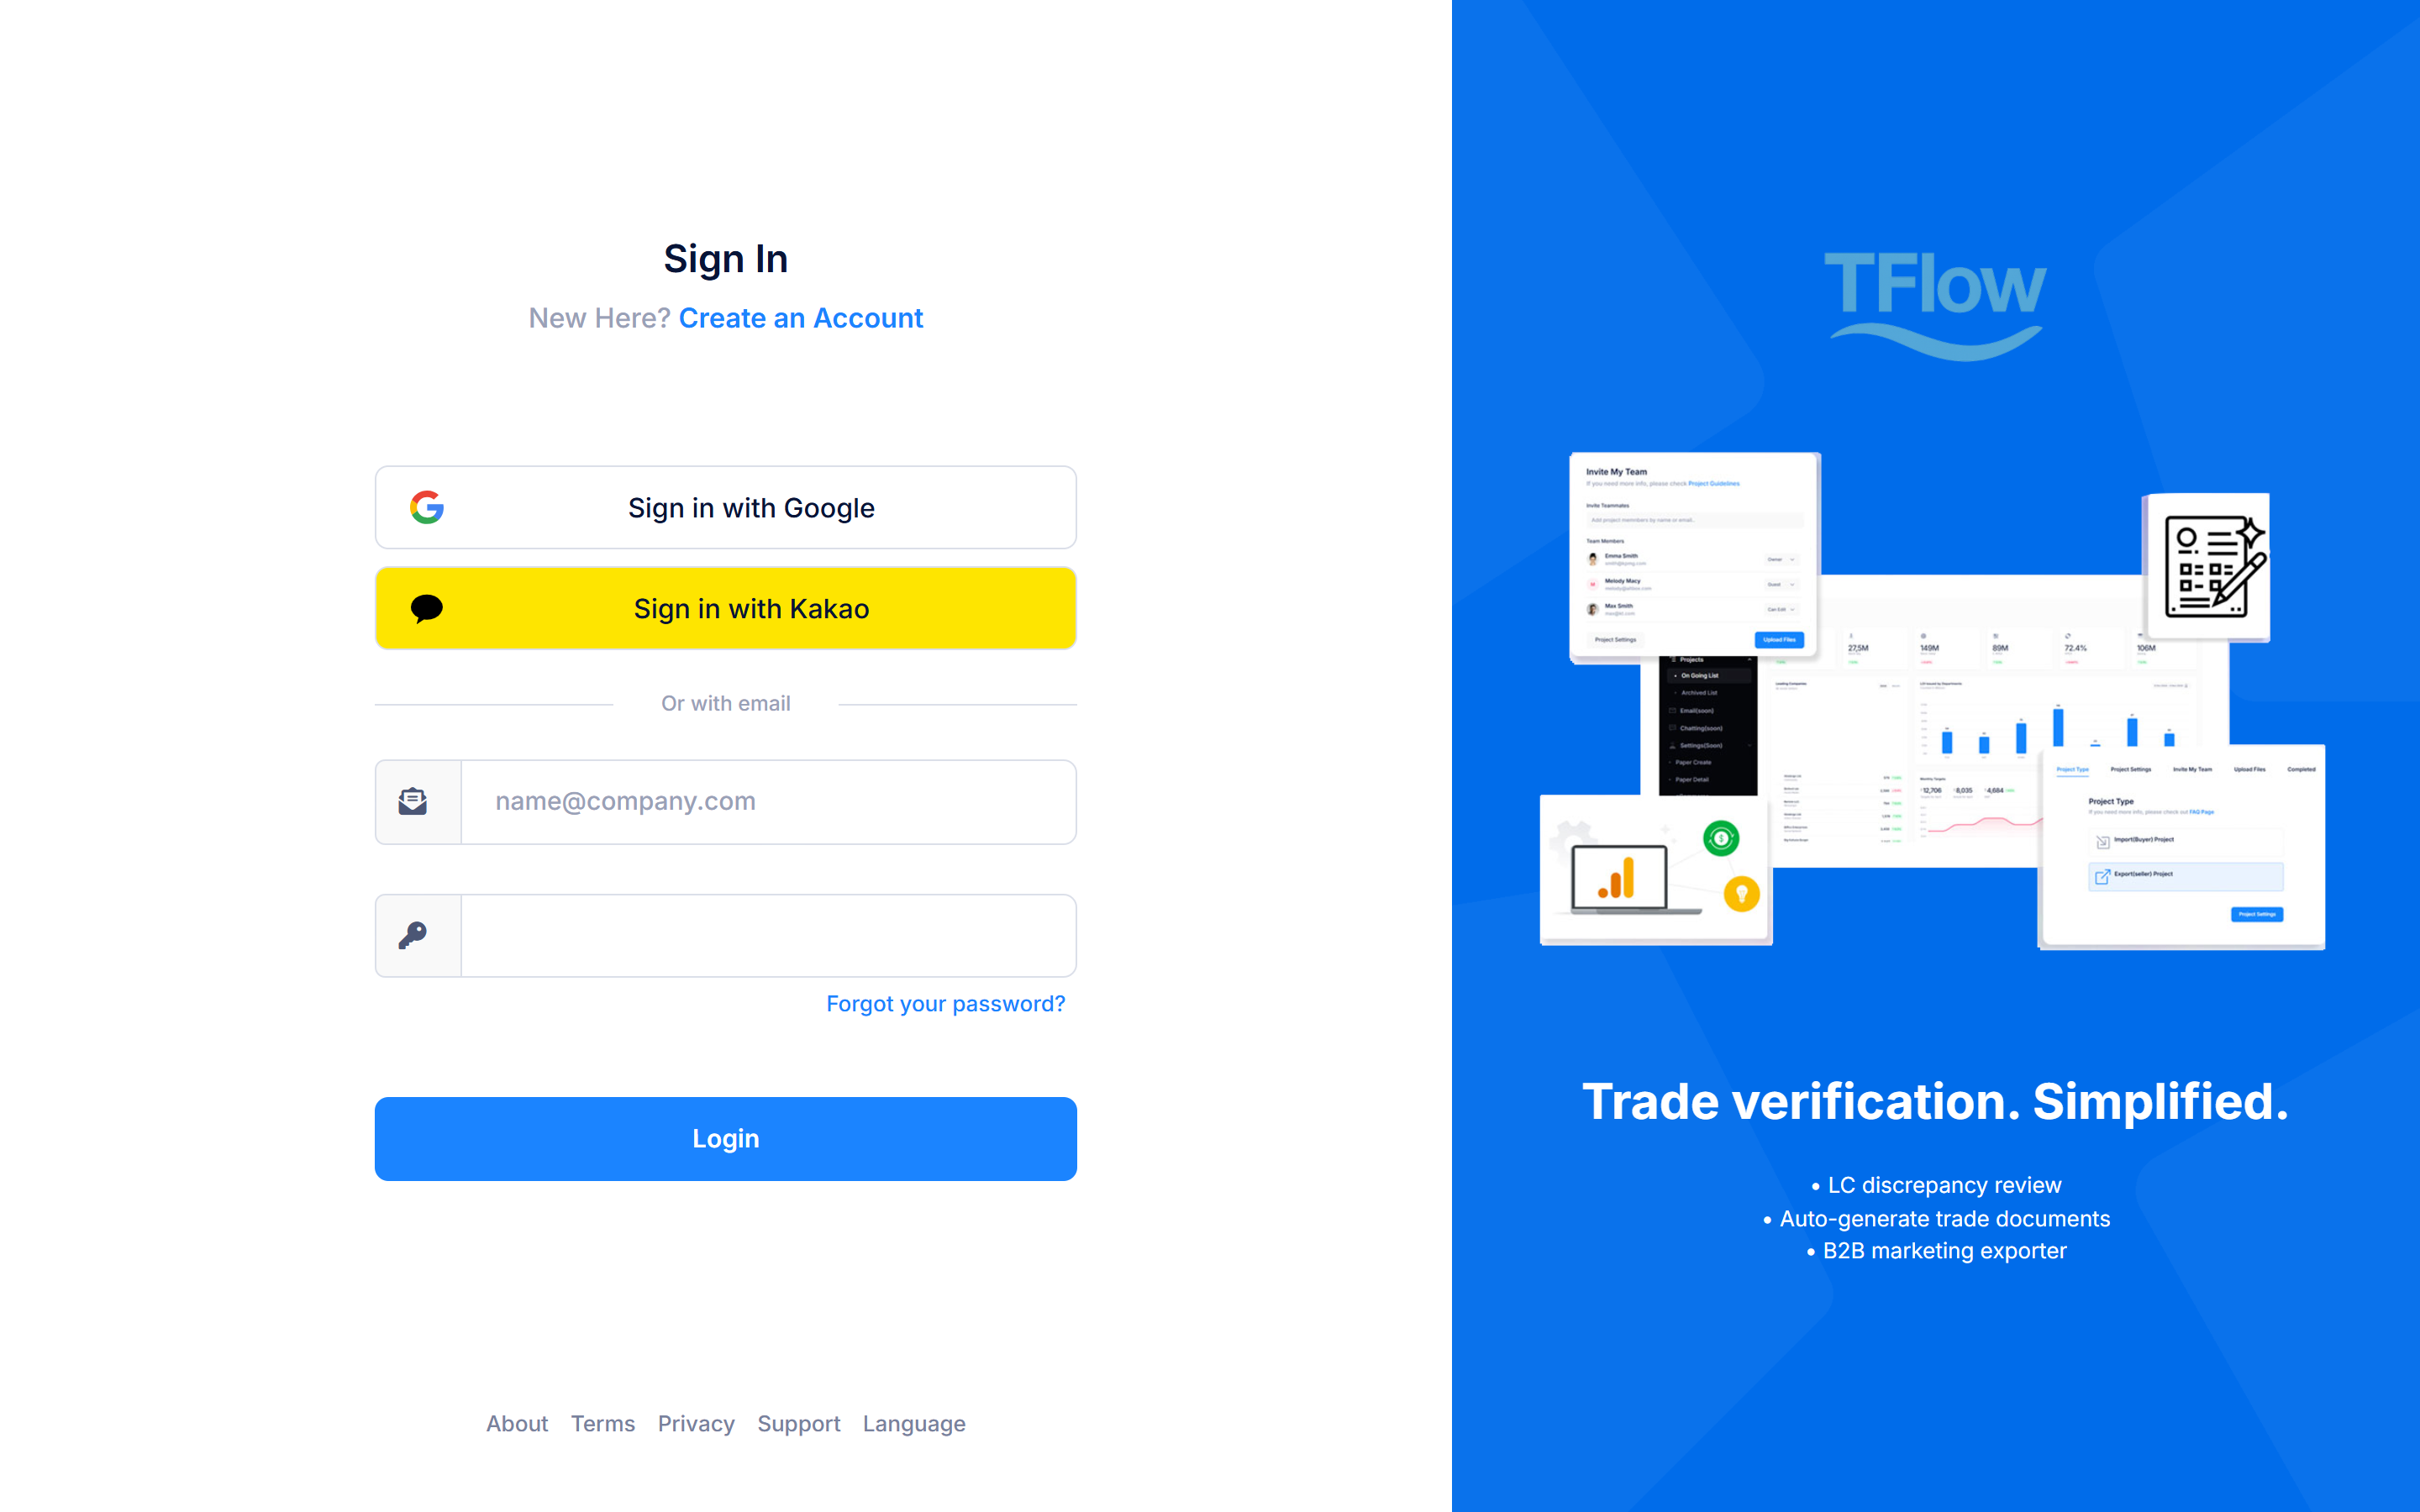
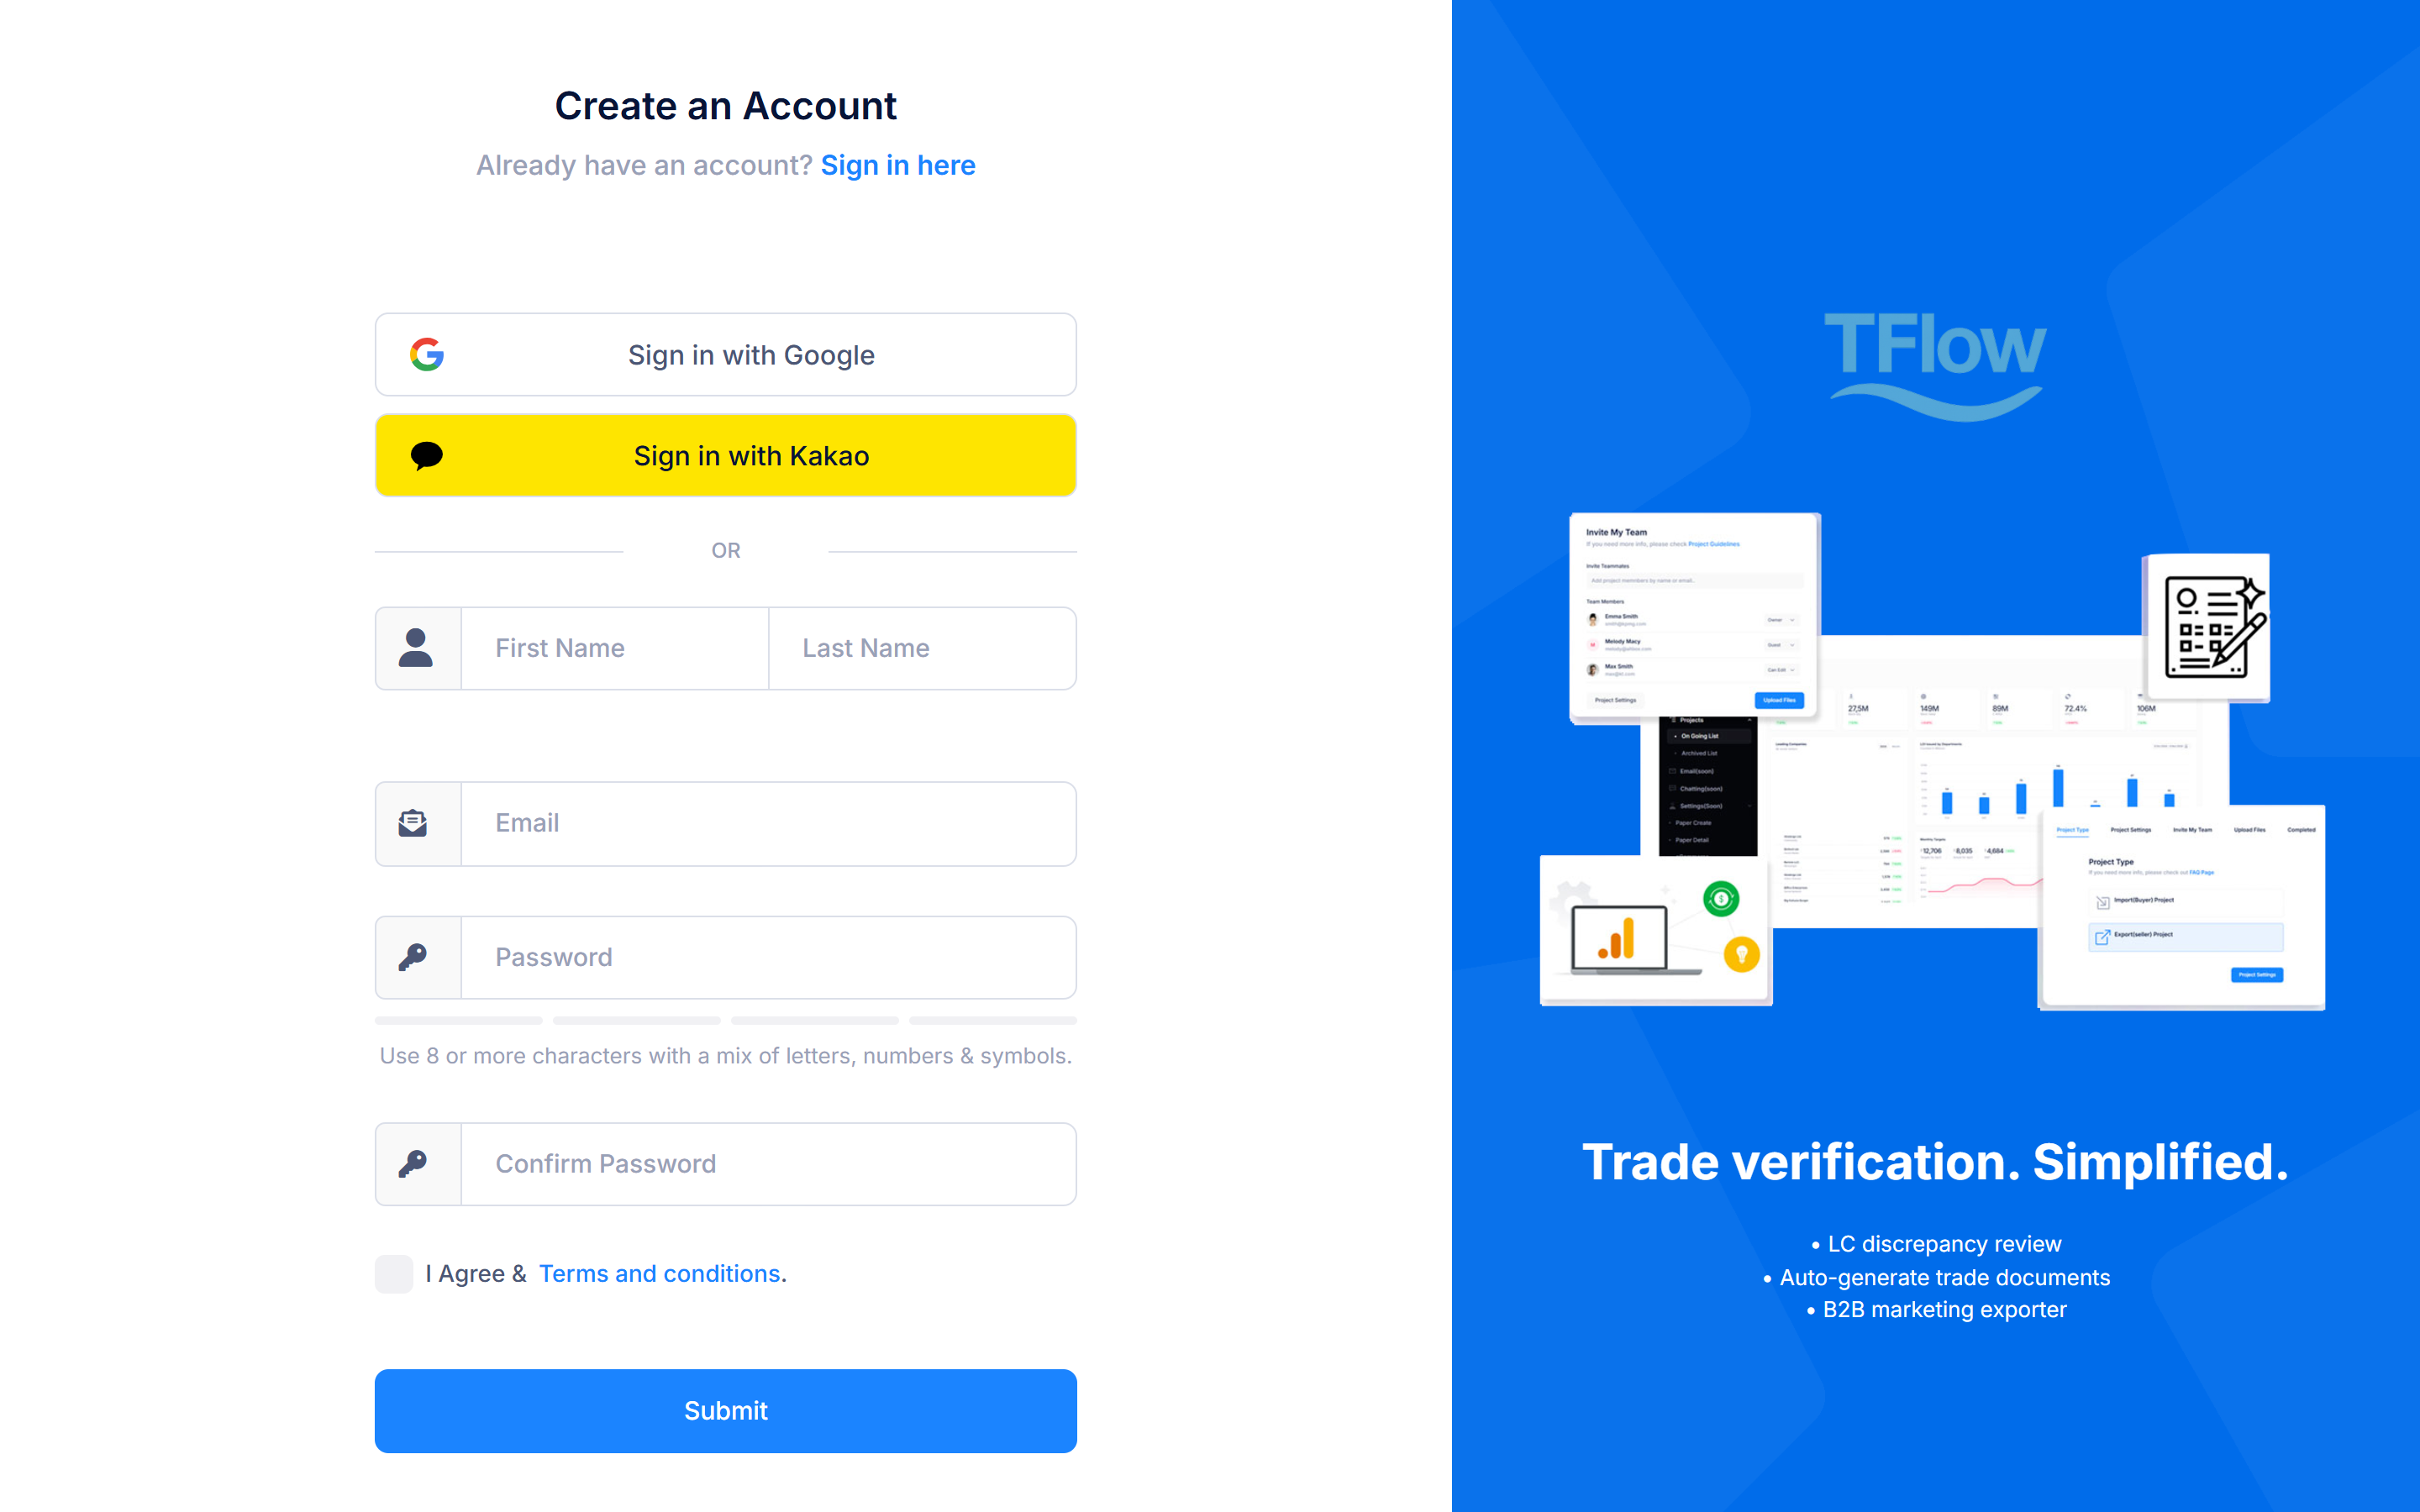
Sign-in screen layout ✨ UPDATED (2026-07)
The authentication screens use a two-column layout: the input form on the left (60%) and the brand panel on the right (40%). On mobile and narrow screens it automatically collapses into a single column with the form on top.
| Area | Description |
|---|---|
| Social login | Sign in with Google / Sign in with Kakao banner buttons span the full width at the top of the form. |
| Separator | "Or with email" — everything below it is the email login area. |
| Email / Password | Input fields with leading icons. The email field shows name@company.com as its example. |
| Forgot your password? | A text link below the right edge of the password field. It used to be a yellow button; now that it is a link, Login is the only button left on the screen. |
| Login | The primary blue button. While the request is in flight it shows "Please wait..." with a spinner. |
| New Here? Create an Account | The sign-up link right under the title. |
| Footer | About · Terms · Privacy · Support links, plus a Language dropdown (English / 한국어). |
- If login fails, the reason is shown in a red alert banner at the top of the form.
- If login succeeds but your organization (company) is not set up yet, a popup appears: Set up organization takes you to your profile, Later takes you to the project list.
- Below the form there is an app install card ("Add to home screen"). If the app is already installed, it turns into an Open in app button. See 0.3. App Install & Push Notifications (PWA) for details.
Password reset (Forgot Password) ✨ UPDATED (2026-07)
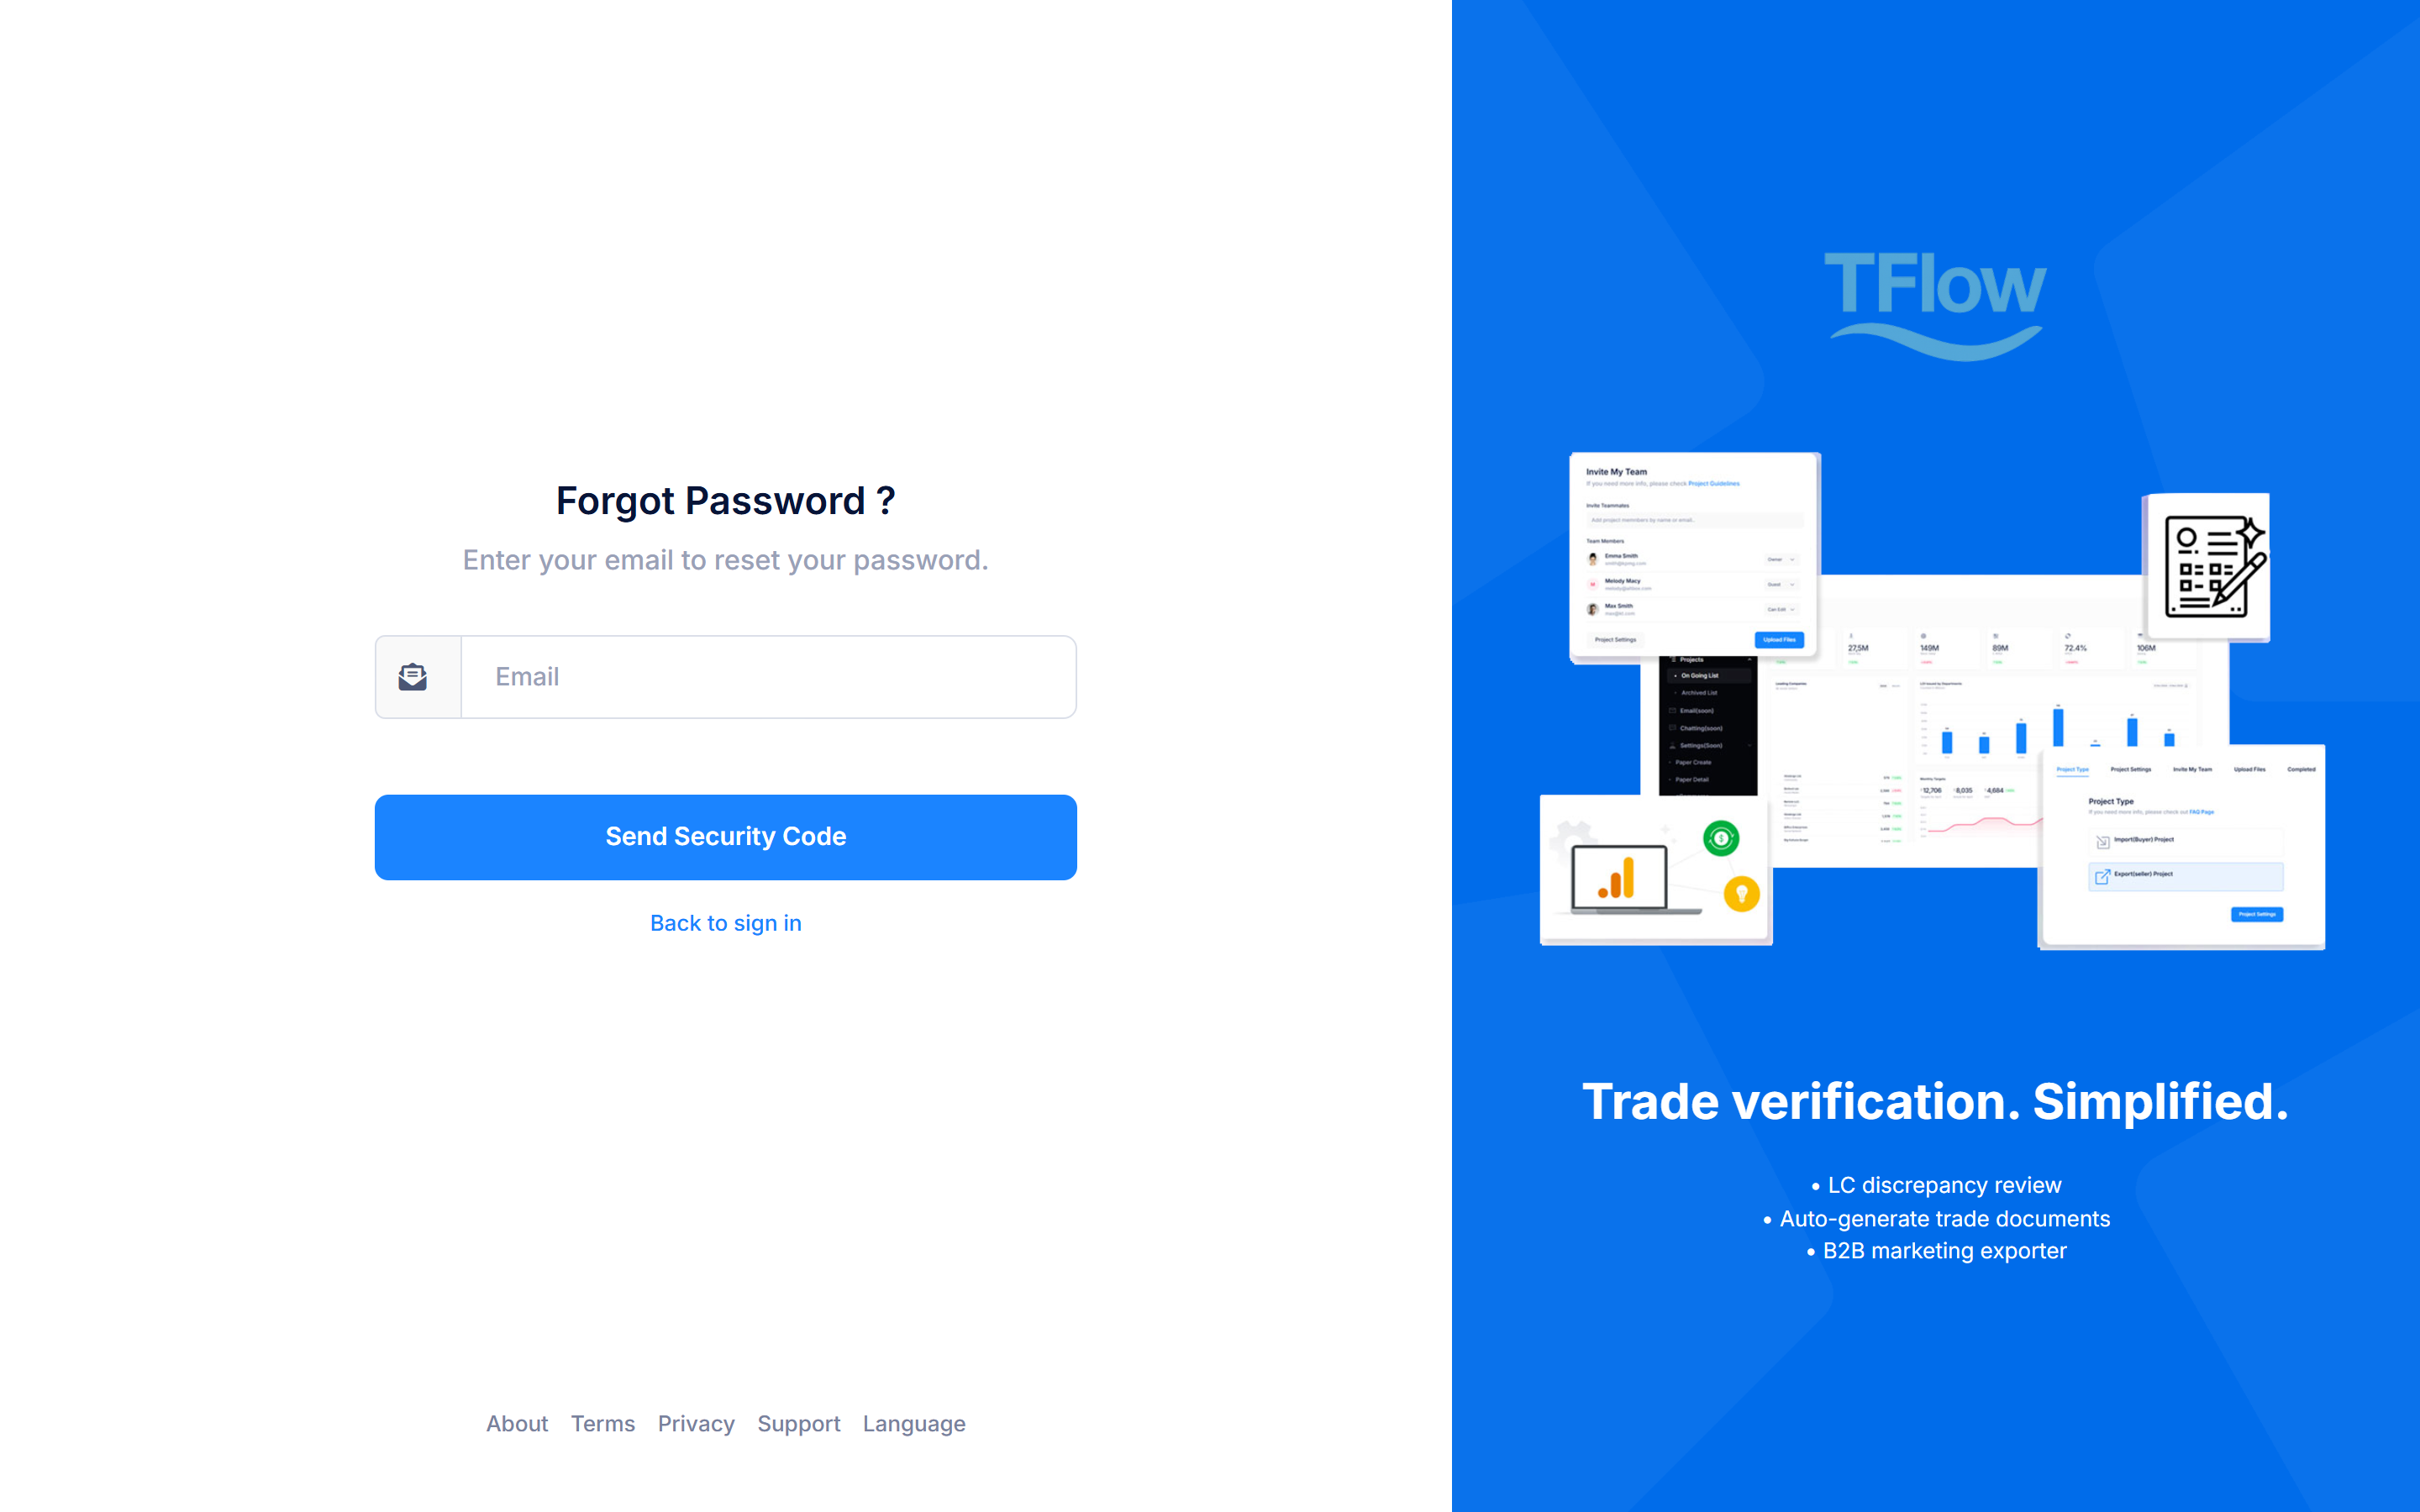
Clicking Forgot your password? on the sign-in screen opens the password reset screen. It runs as two steps on a single screen.
- Send Security Code — Enter the email you signed up with and click Send Security Code. A verification code is sent to that address.
- Change Password — The following fields expand on the same screen, and the button label changes to Change Password.
- Code: the verification code you received by email
- Password / Confirm Password: your new password (a strength meter is shown as you type)
- On success you see "Your password has been changed successfully!" and you are returned to the sign-in screen.
- Password rule: at least 8 characters, mixing letters, numbers, and symbols.
- If you edit the email address after the code was sent, the extra fields collapse and you go back to the Send Security Code step — handy when you requested the code for the wrong address.
- The Back to sign in text link at the bottom returns you to the sign-in screen at any time. (This used to be a 'Cancel' button.)
Tell the chatbot (Lyra) "Take me to the OOO screen," or follow the Shortcut guidance in each step below to start your trade work.
💡 AI Coach Tutorial: When you log in for the first time, the AI Coach automatically provides an interactive tutorial that walks you through the main features. You can experience it hands-on by following the highlights and speech bubbles on screen. For details, see 0.2. AI Coach Tutorial Guide.
1. First Step: Register My Partners (Friends)
Trade cannot be done alone. You need to add the partners you trade with (exporters/importers/forwarders, etc.) to your network.
- Go to the My Friends menu.
- 💬 Try telling the chatbot: "Open the friends management screen" or "Go to the address book."
- Search for a partner's email and send a Friend Request.
- Once the other party signs up and accepts, you can invite each other to projects and chat rooms.
2. Second Step: Create a Trade Project
The center of all work is the "Project." You create one project room per import/export transaction.
- Go to the Projects menu and click
New Projectat the top right.- 💬 Try telling the chatbot: "Go to the screen for creating a new project."
- Follow the simple 3-step wizard: select the project type (export/import) → enter basic information such as project name and counterparty → invite team members.
- You can invite team members later, so you may enter just the basic information and create the project first.
3. Third Step: Upload Trade Documents and Link Email
Gather all related communications and documents inside the created project room.
- Drag and drop contracts (PI), B/L, packing lists, etc. into the Documents tab.
- 💬 Try telling the chatbot: "Open the document upload screen."
- Go to the Email menu and find the emails exchanged with your partner.
- 💬 Try telling the chatbot: "Show me my inbox."
- Click Link to Project (the chain-link icon) at the top right of a received email to map it to the project you just created. The email is now permanently stored in the project's progress history.
4. Fourth Step: Safe Escrow Payment
A conditional payment system prevents non-payment or shipment-delay fraud.
- Go to the Escrow (Payment > Escrow) menu.
- 💬 Try telling the chatbot: "Go to the escrow payment screen."
- Lock the funds into a blockchain smart contract, and set up a very strong safety condition: "The funds are released (unlocked) once a specific document (B/L) is uploaded and approved by the system (LEO)."
0-1. Troubleshooting During the Tutorial (FAQ)
- Q: "It's too complicated to figure out which menu to go to, and I got lost."
- A: At any time, open the chatbot (Lyra) at the bottom right of the screen and type "Take me to such-and-such screen" or "Where do I pay?" — the AI will instantly navigate you to the right screen tab on your behalf!
- Q: "The 'Forgot Password' button is gone from the sign-in screen."
- A: It became a link, not a button. Click the
Forgot your password?text below the right edge of the password field. Since the 2026-07 redesign,Loginis the only button on the sign-in screen.
- A: It became a link, not a button. Click the
- Q: "I don't see the new password fields on the password reset screen."
- A: Password reset has two steps. Enter your email and click Send Security Code first — only then do the code and new-password fields expand on the same screen, and the button label changes to Change Password.
- Q: "The verification code email never arrived."
- A: Check your spam/junk folder first. If you mistyped the address, simply editing the email field takes you back to the Send Security Code step, so you can resend it to the correct address.
- Q: "My new password keeps getting rejected."
- A: The password must be at least 8 characters mixing letters, numbers, and symbols. Watch the strength meter fill up as you type.