3.1. Proof of Funds (PoF) Guide
✨ UPDATED (2026-08) — Proof of Funds now works as a per-milestone request-and-issue flow on the project Payment screen. The exporter requests it, the importer issues it with their own wallet, and paying the exporter directly follows in the same place.
Proof of Funds (PoF) is a certificate TFlow issues after confirming that the importer "actually holds no less than the amount of this transaction." Issuing it does not lock up or move any money — it only produces a certificate stating what was confirmed.
- Wallet — Acts as the account you hold and send funds from. Unlike a bank account you own and manage it yourself, and each transfer requires a signature in the wallet (similar to entering an OTP for a bank transfer).
- Escrow — Holding funds locked aside until agreed conditions are met — the same idea as conditional payment in trade.
- Receiving permission (TrustLine) — A one-time setting that registers a wallet as willing to receive a particular currency. Just as you need a dollar account to receive dollars, a wallet needs this per currency. On screen it is the Set up T-RLUSD line button.
- T-RLUSD — The test stablecoin (a dollar-pegged token) currently used for payments and fees.
- Milestone — One instalment of a split payment, such as the advance, interim, or balance payment.
1. Where to Do It — Screens and Roles
Entry: Project > Payment — the screen has three tabs.
| Tab | Who uses it | What it's for |
|---|---|---|
| Settlement Dashboard | Everyone | Create and manage milestones (instalments) |
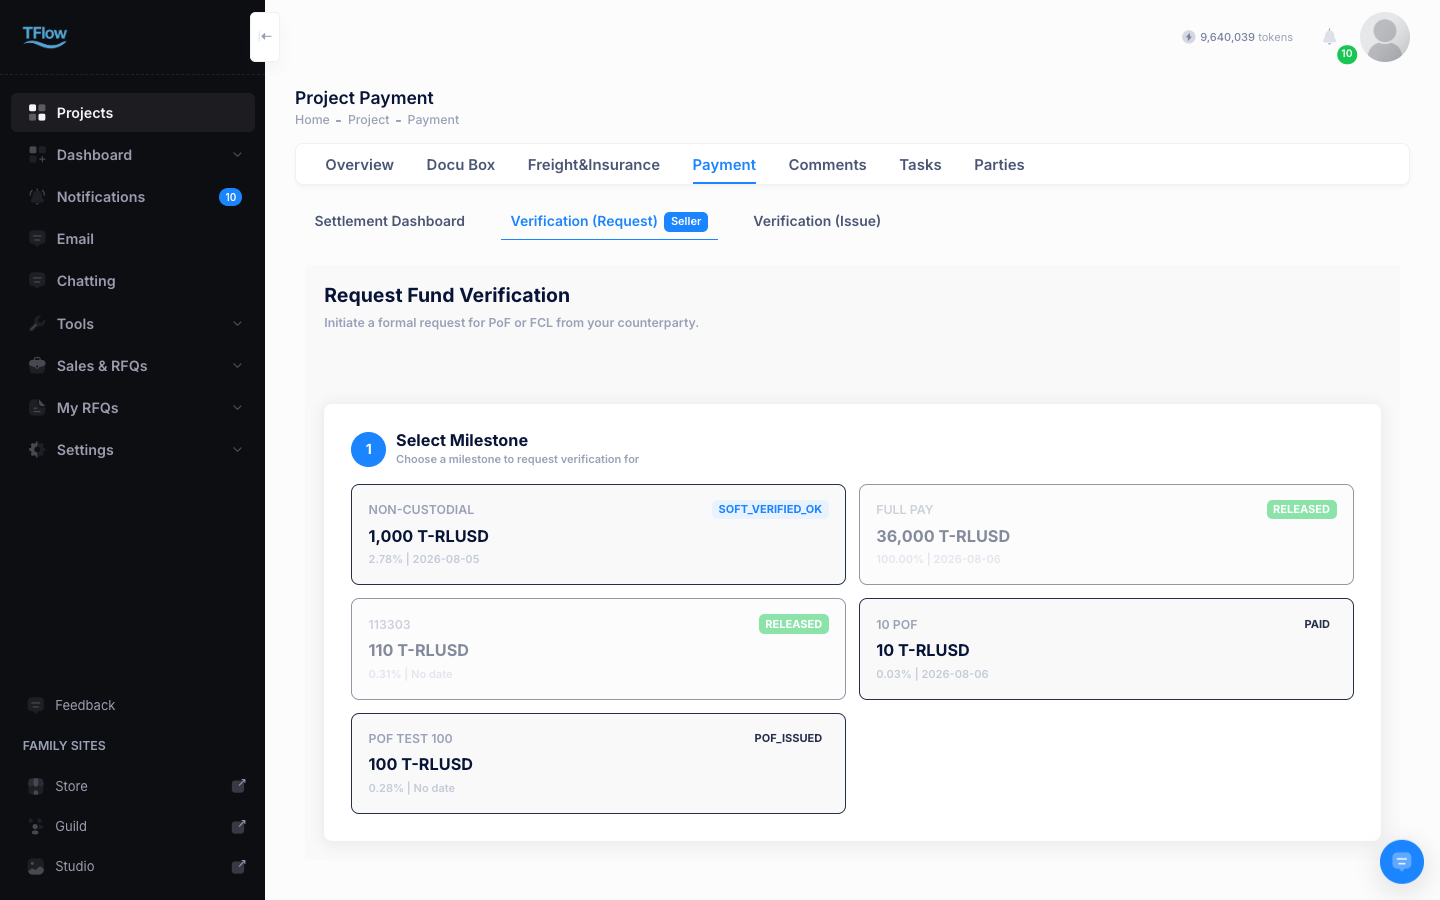
| Verification (Request) | Exporter (seller) | Formally request proof of funds from the importer |
| Verification (Issue) | Importer (buyer) | Connect a wallet and issue the certificate for a request |
- Your role follows the trading party you were registered as (importer/exporter) on the project's Share screen. An
Exporter/Importerbadge appears next to the tab. - You can open the other role's tab to look, but a "This is a view-only screen" notice appears and the buttons that actually do something (wallet selection, sending the request) are hidden.
2. Exporter — Requesting Proof of Funds (4 Steps)
Fill in the four steps on the Verification (Request) tab and the request is sent.
| Step | Name | Description |
|---|---|---|
| 1 | Select Milestone | Choose which payment instalment the proof is for — only milestones still in draft can start a new request |
| 2 | Verification Type | Choose Proof of Funds (PoF) (FCL is coming soon — see 3.2 below) |
| 3 | Receiving Wallet | Select or connect the walletterms you want to be paid into — required for a proof-of-funds request too |
| 4 | Instructions (Optional) | Any note or condition for the importer |
- If there is no milestone to choose, add one first on the Settlement Dashboard tab.
- Sending the request notifies the importer with a "Fund Verification Requested" alert. Before it is issued, you can undo it with Cancel Request.
💡 Why does a proof-of-funds request need a receiving wallet? Because the request itself says "pay me into this wallet." Once the importer issues the certificate, they can send the payment straight to it.
3. Importer — Issuing the Certificate
Pick the requested milestone on the Verification (Issue) tab and issue it.
- Connect a wallet: Connect the wallet holding your funds (see below for how). TFlow checks that the wallet is yours and that the balance really is sufficient — if the balance is below the amount being attested, it will not be issued.
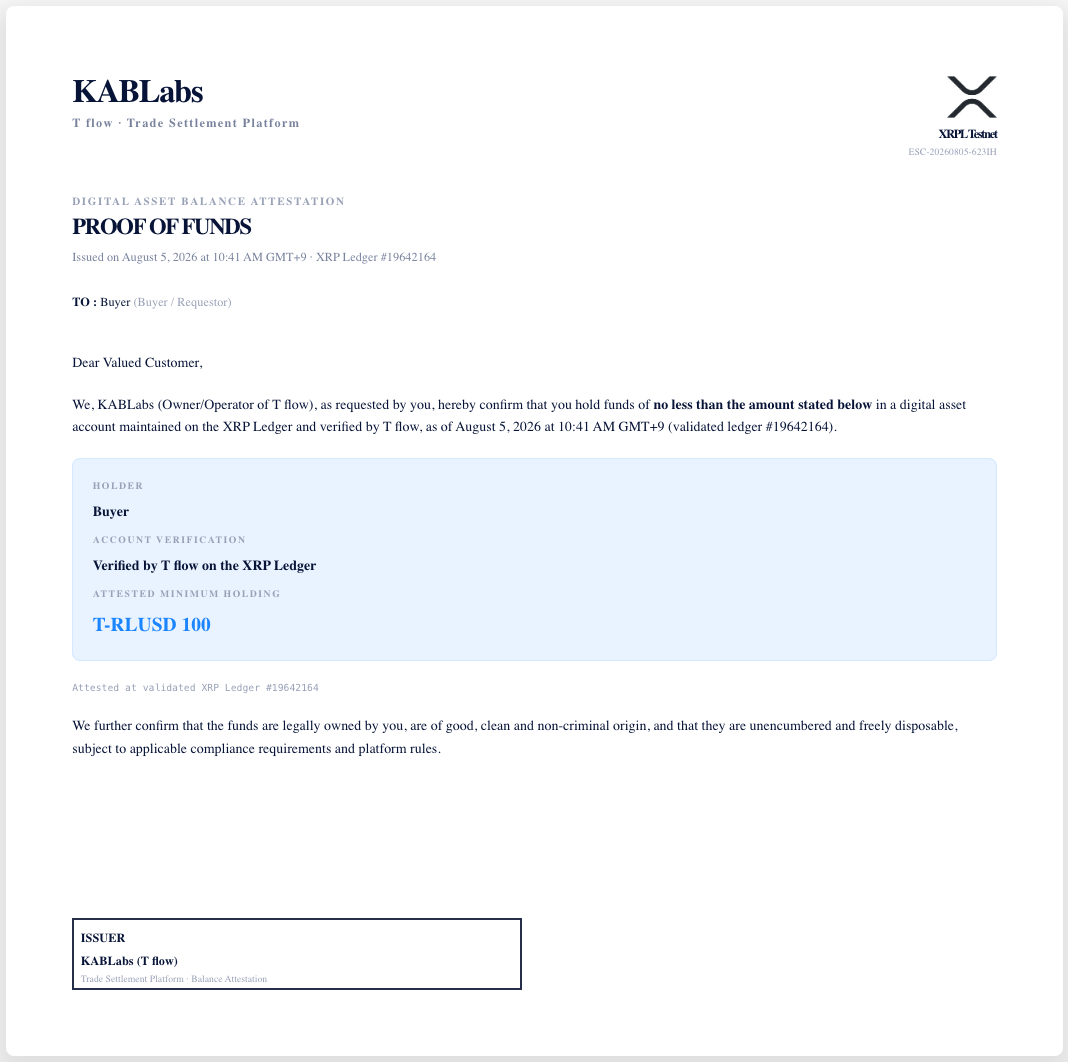
- Preview (optional): You can see how the certificate will look before issuing (the preview is stamped as a draft).
- Issue: Press Issue PoF and sign the 1 T-RLUSD issuance fee in your wallet to complete issuance.
ℹ️ Issuing locks up nothing and sends nothing anywhere. Apart from the fee, no amount leaves your wallet — the certificate is a record of the balance confirmed at that moment.
What the Certificate Shows — the Wallet Address Is Never Published
| Item | How it appears |
|---|---|
| Holder | The company (organization) name as of issuance — the company is the subject, not an individual |
| Account Verification | "Verified by T flow on the XRP Ledger" — the wallet address is not shown. Publishing an address would also expose every transaction that wallet has ever made |
| Attested minimum holding | Written as "holds no less than the stated amount" |
| Basis of confirmation | Only the blockchain record number where the check took place (the transaction number is omitted too, since it indirectly reveals the address) |
- An issued certificate can be reopened at any time by selecting that milestone again.
- To pass it on, use Download PDF or print it (it comes out as a single A4 page).
After Issuance — Paying the Exporter Directly ✨ NEW
Once the certificate is issued, a Pay Seller Directly button appears in its place.
- It sends the money immediately from your wallet to the exporter's wallet, without going through escrowterms. There is no additional fee.
- Before sending, TFlow checks whether the exporter's wallet can receive this currency (receiving permissionterms) and tells you before the signing step if it cannot.
- As the confirmation dialog states, the payment goes through without escrow protection and cannot be undone. The payment record is kept alongside the certificate, and the status becomes Paid.
Connecting and Registering Wallets ✨ NEW
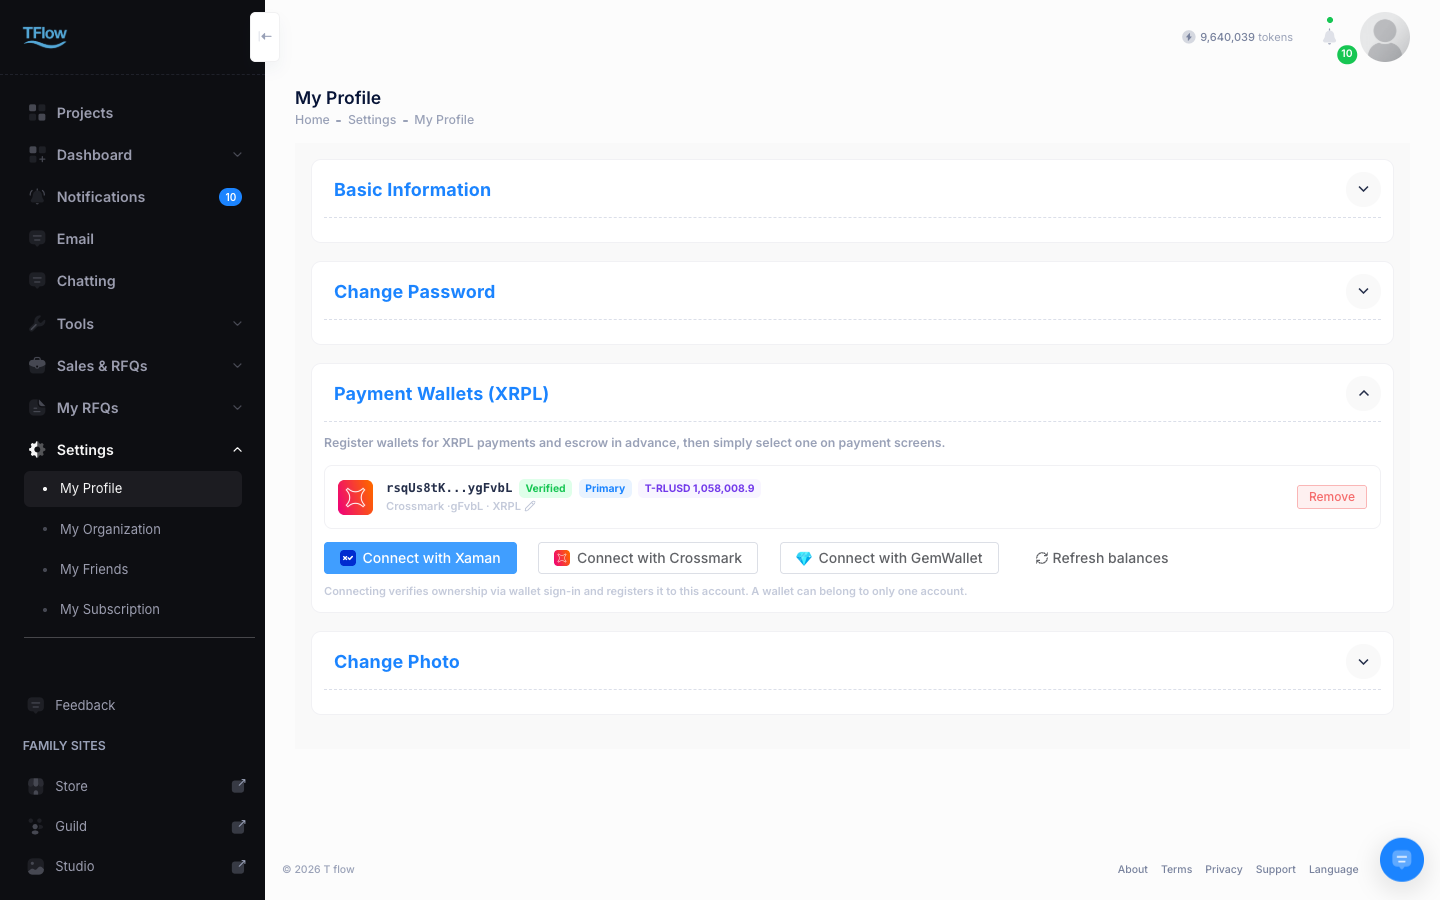
You can connect a wallet directly on the Payment screen, or register wallets in advance under My Profile > Wallets. With them registered, you simply pick one from the list when paying.
| Wallet | Where it runs | Notes |
|---|---|---|
| Xaman | Phone app | The recommended option. When a signature is needed your phone gets a notification, or you can scan the on-screen QR instead. The only option that works on a phone. |
| Crossmark | PC browser extension | You sign in the extension window |
| GemWallet | PC browser extension (beta) | Supports connecting, ownership checks, and payments |
- When connecting, you sign once to confirm the wallet is yours, and it is registered to your account. One wallet can be registered to only one TFlow account.
- In Wallets you can name a wallet (alias), set a default, set up receiving permission (the Set up T-RLUSD line button), check balances, and disconnect. Wallets whose ownership check is incomplete appear dimmed and cannot be used for payments.
4. Milestone Progress
Draft → Requested → PoF issued → Paid
- A milestone that is already finished (paid, refunded, or cancelled) cannot issue anything new. Create a new milestone instead.
5. Proof of Funds Troubleshooting (FAQ)
- Q: "The signature has not been completed in Xaman yet" / "The signing request was not found."
- A: Either you haven't finished signing in the Xaman app on your phone, or the signing request has expired. Reopen the app notification (or the QR on screen) and finish signing. If the request expired, press the same button again to get a fresh signing request.
- Q: "The send-request button won't activate."
- A: You have to complete step 3 (Receiving Wallet) before you can send. Specify the wallet you want to be paid into first.
- Q: "It says my balance is insufficient when I try to issue."
- A: If the connected wallet's actual balance is below the amount you're attesting to, it will not be issued. Reconnect with a wallet that holds enough, or top it up, then try again.
- Q: "I can't see the wallet selection or issue buttons at all."
- A: On a tab that doesn't match your role (for example, an exporter opening the Issue tab) you can only look — the buttons are hidden. Also, only the parties registered as importer/exporter on the project's Share screen can request or issue.
- Q: "I tried to pay but it says the recipient cannot receive it."
- A: The receiving wallet either has no receiving permission for that currency or lacks capacity. The exporter just needs to press Set up T-RLUSD line once in their wallet management (or on the Payment screen).